
How I built XSCP
Hi Everyone! In this article I’ll explain how I built XSCP (XSCP Stream Communication Protocol) a text-based custom application layer protocol over TCP. The essential idea of this project is reinventing the wheel for learning purposes. We will dive into the protocol implementation (PDU definition and parsing) using Rust, move on to building a robust concurrent XSCP server in Rust, and finally, create a client to test the communications.
As a final touch, I will also showcase a real XSCP communication example between multiple clients, complete with a Wireshark traffic capture. How? Because I also developed my own custom protocol dissector in Lua!
Let’s start with the essentials and the core concepts.
What is XSCP. Why over TCP? Why in Rust?
XSCP is a minimalistic text-based protocol thought for sending UTF-8 encoded messages without the overhead of other protocols such as HTTP. It can be deployed in many different contexts such as chat rooms or sending basic notifications.
Operating at the application layer, XSCP must be encapsulated in a transport layer protocol. In this case, I chose TCP because it guarantees ordered packet delivery, allowing me to work with a continuous stream of bytes without worrying about packet reordering. The main goal of this project is to implement an application layer protocol, not to struggle with the complexities of UDP.
Why Rust? Beyond the exponential growth of its popularity, Rust is not just hype. As a modern systems language, it prevents runtime bugs like memory leaks thanks to its ownership model and borrow checker rules. This makes it the perfect choice for a network protocol implementation and its concurrent server.
Protocol architecture
XSCP communication workflow is inspired by other Application Layer protocols such as HTTP (Hypertext Transfer Protocol) or SIP (Session Initiation Protocol) with a method and status code architecture. Basically, the client sends a request specifying a method, and the server replies with a corresponding status code.
However, unlike HTTP, XSCP is stateful, meaning that the connection state is completely synchronized between the client and the server. When designing stateful protocols, creating a state machine is highly recommended. My approach is straightforward, rather than explaining it in text, the state machine diagram below is self-explanatory.
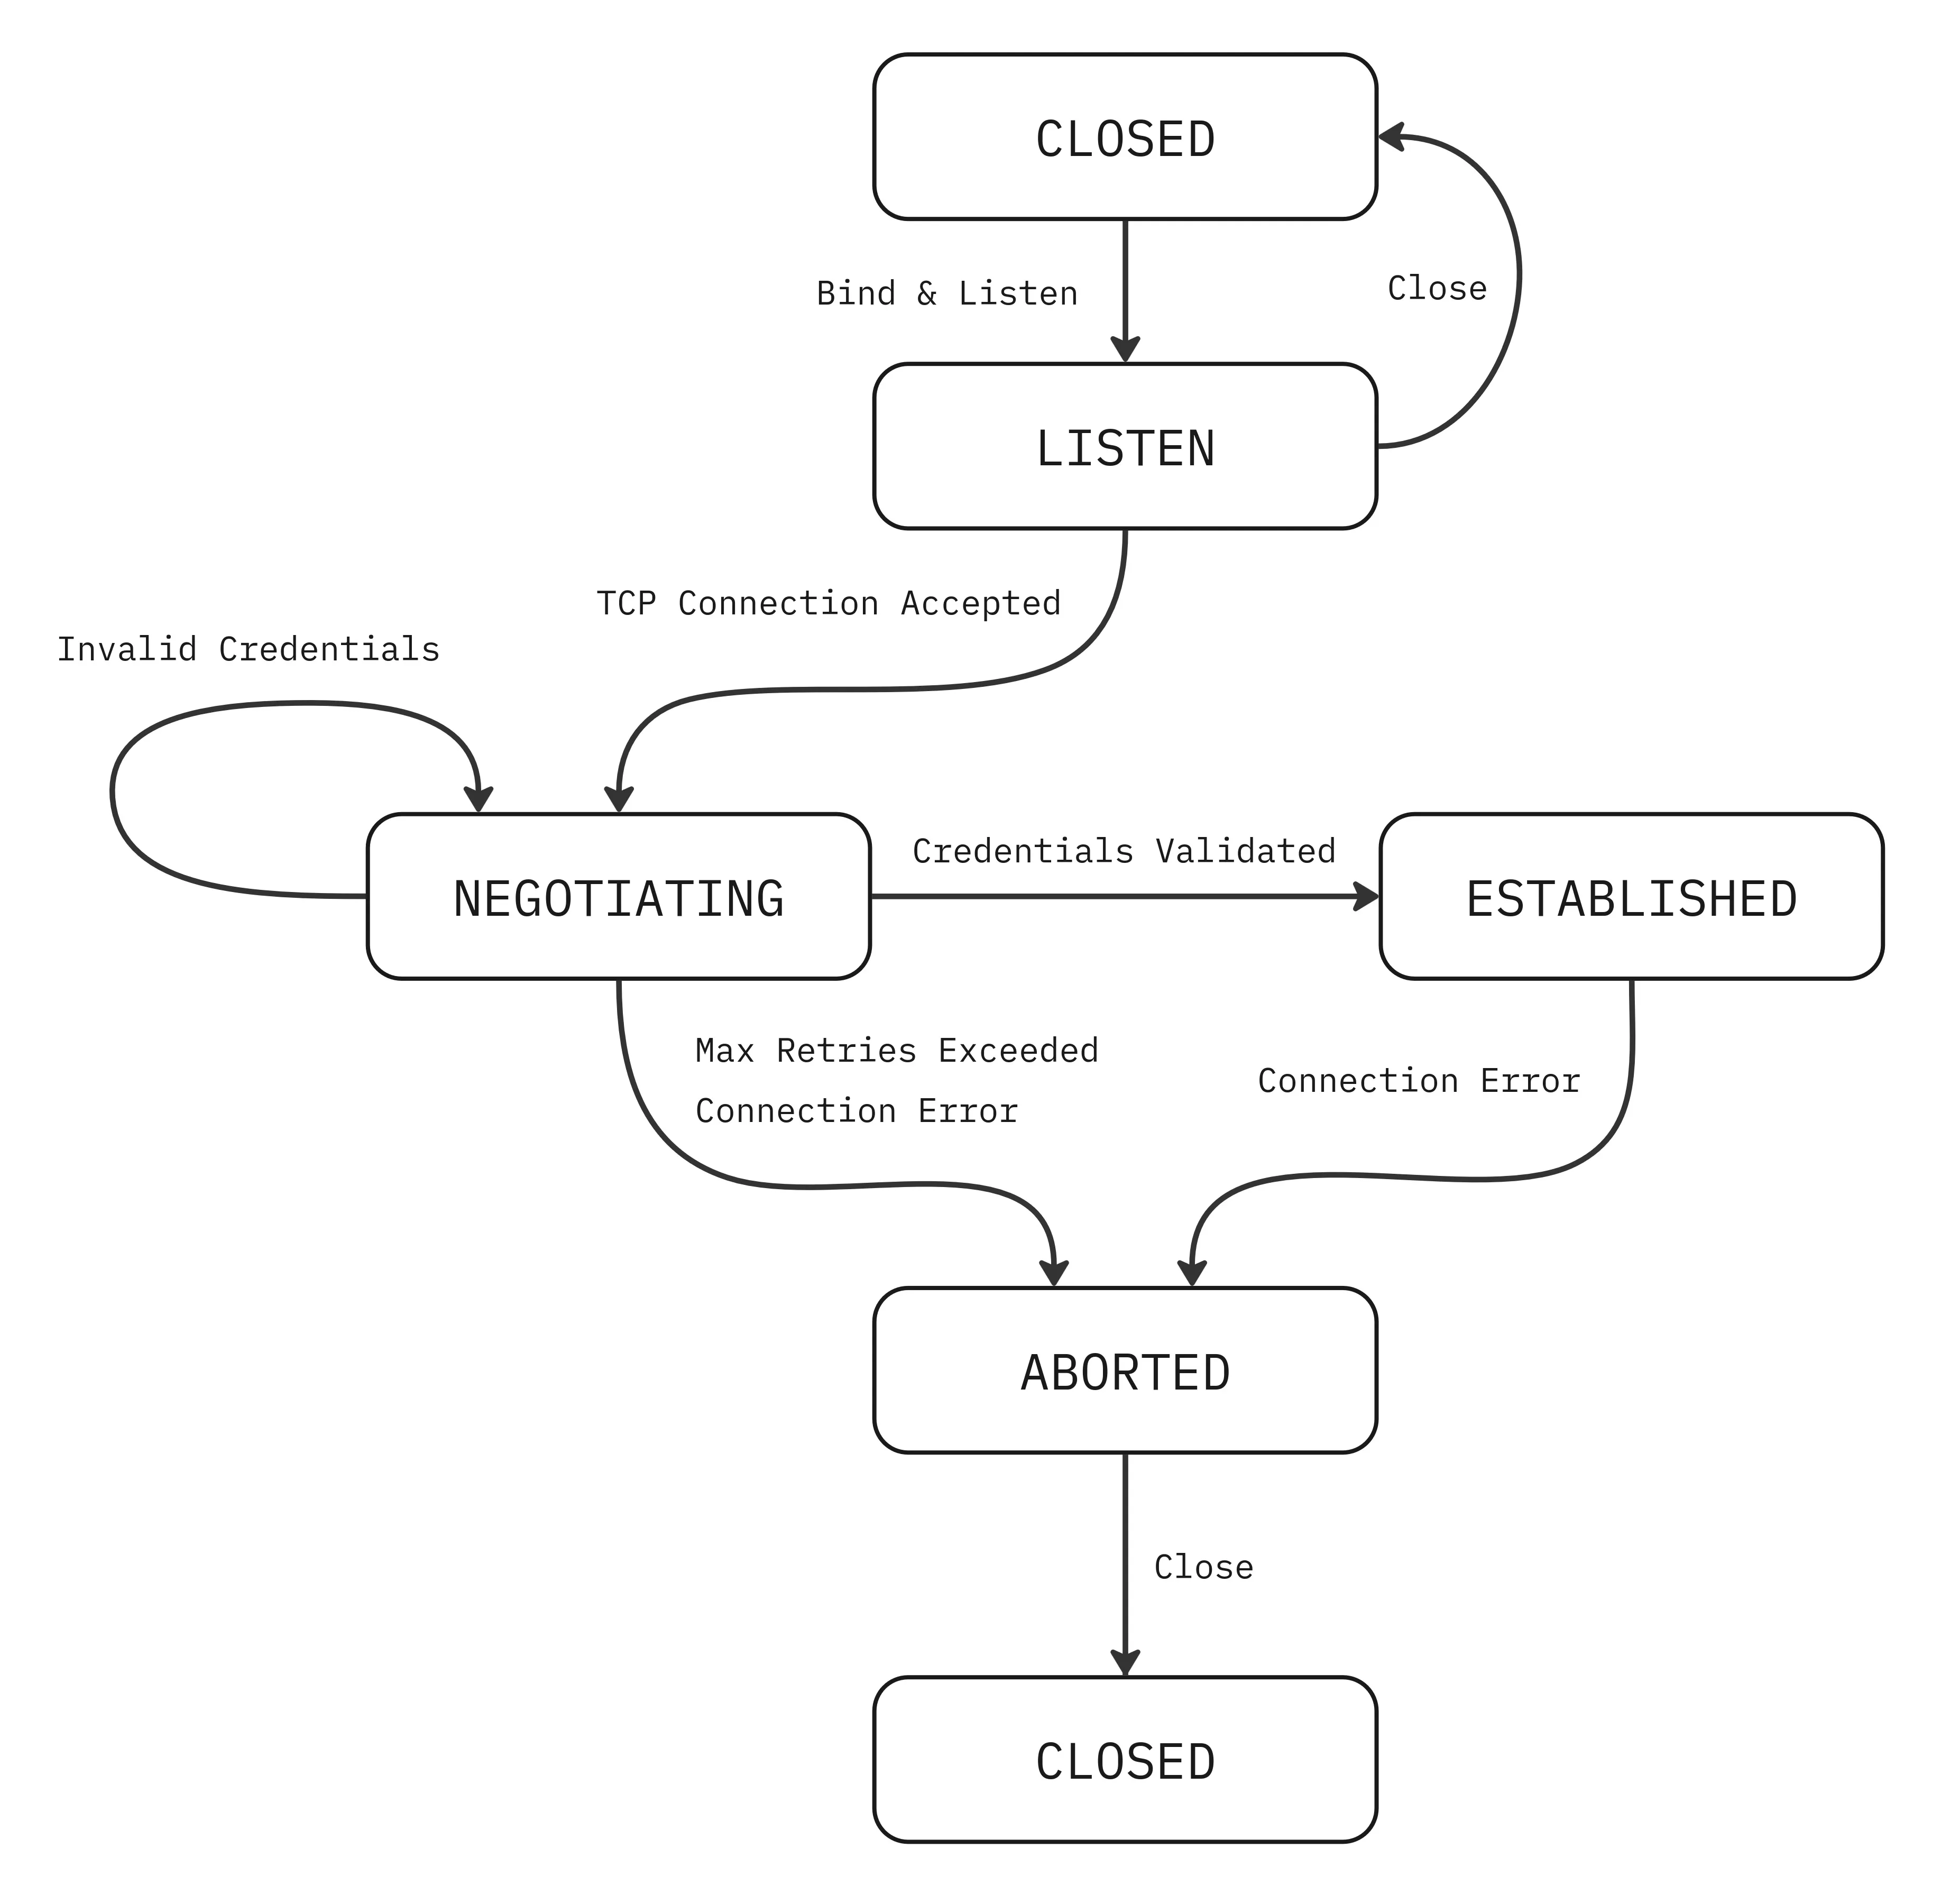
Thanks to this stateful architecture, I implemented a notification system where the clients can receive messages asynchronously from the server without explicitly requesting them. Currently, XSCP only supports broadcast notifications, meaning that when a client sends a message, the server broadcasts it to all other connected clients.
PDU Definitions
XSCP features 3 types of PDU (Protocol Data Unit): Requests, Responses and Notifications. Each serves a distinct purpose and adheres to strict byte limitations. Let’s break them down!
Request
Requests are always initiated by clients. It is a message sent to an XSCP server that triggers a specific action and mandates a response. Requests consist of three fields:
- Operation Code (OPCODE): Defines the action. Supported opcodes include login (LOGN), send a message (SEND) and disconnect (EXIT).
- Source: Identifies who is making the request.
- Message (Payload): contains the data to be transmitted.
Each field has a constrained maximum size. The request wire format is structured as follows:
+------------------------------------------------------------------+
|   OPCODE (4 Bytes)   |    Source (Min 3 Bytes, Max 32 Bytes)     |
|------------------------------------------------------------------|
|          Message (Max 472 Bytes) + \r\n (2 Bytes)                |
+------------------------------------------------------------------+
Furthermore, I chose to use the pipe character | as a field delimiter and CRLF sequence \r\n as the en of the request. To prevent message smuggling, it is strictly forbidden to include \r\n in the source or message fields. Request PDUs have a maximum size of 512 bytes.
Response
Responses are always sent by the server, solely to reply to a request. Responses consist of only two fields:
- Status Code: 200 (Ok), 400 (Bad Request), 401 (Invalid Credentials), 402 (Exceeded Auth Attempts) and 500 (Internal Server Error)
- Reason Phrase: a short, human-readable description that complements the status code for debugging purposes.
As in the Request, each field has a constrained maximum size, the wire format is structured as follows:
+-----------------------------------------------------------------------+
|   Status Code (1-3 ASCII digits)   |   Reason Phrase (Max 32 Bytes)   |
+-----------------------------------------------------------------------+
Notification
A Notification is an unsolicited message pushed from the server to a client (or relayed between clients via the server) to notify them of an event. Unlike a Request, a Notification does not require a Response. Currently XSCP only works with broadcast notifications. Notifications consist of three fields:
- Notification Type: currently, only broadcast (BRDC) is supported.
- Source: identifies the client who originated the notification.
- Message: contains the data carried by the notification.
The wire format is specified below:
+---------------------------------------------------------------------------+
|   Notification Type (4 Bytes)   |   Source (Min 3 Bytes, Max 32 Bytes)    |
|---------------------------------------------------------------------------|
|                 Message (Max 472 Bytes) + \r\n (2 Bytes)                  |
+---------------------------------------------------------------------------+
As with the Request, including CRLF within the source or message fields is strictly forbidden.
PDU Parsing
Once the PDUs are defined, the next step is to implement them in Rust. I developed a dedicated crate for this, which encapsulates the parsing and validation logic, along with custom data structures to manage all PDUs within a Rust application. Here is a quick example of how to work with them:
// Creating an XscpRequest in memory from raw bytes
let request = match XscpRequest::parse(&raw_request) {
    Ok(req) => req,
    Err(_) => {
        eprintln!("Error parsing request");
        std::process::exit(1);
    }
};

// Creating a custom XscpResponse
let response = XscpResponse::try_new(200, "Login Successful").unwrap();
For more details, you can visit the official crate at https://crates.io/crates/xscp. Feel free to check out the documentation and use it in your own projects!
Designing a concurrent server
For real, production-ready projects, a server must be concurrent to handle multiple connections and tasks simultaneously. We have two different approaches: CPU-bound tasks using a thread pool, and I/O-bound tasks leveraging an asynchronous runtime. In my case, the server will barely use the CPU for heavy processing; instead, it spends most of its time waiting for incoming requests or new connections. Therefore, an I/O-bound architecture is perfect for this scenario. I selected tokio runtime, which is the de facto standard in the Rust industry.
An XSCP server runs on port 7878 and manages several concurrent tasks simultaneously:
- Accepting new connections.
- Handling authentication.
- Processing Requests and sending Responses and Notifications.
tokio provides highly useful tools to manage this, thanks to features like tokio::spawn and tokio::select!.
For more implementation details, you can check out my GitHub repo.
An XSCP Communication Example
The final concept is the client. An XSCP Client is a process which can also “speak” XSCP, send Requests and parse Responses and Notifications. XSCP is language-agnostic, so you can develop your own XSCP Client for example in Python, C or in my case in Rust, again with tokio to handle concurrently sending Requests and receiving Responses and Notifications while simultaneously printing messages to stdout.
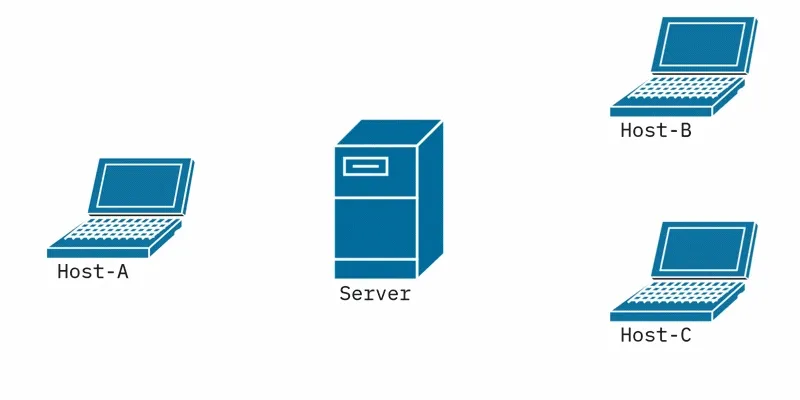
In the animation below you can see the most basic XSCP communication between 3 connected clients where a client HOST-A sends a message to the server and the server broadcasts it to all the connected clients, in this case HOST-B and HOST-C in addition to sending a 200 Ok response.
Building a Wireshark Protocol Dissector
As a telematics engineering student, I am used to debugging connections with Wireshark for standard protocols such as TCP, OSPF or ARP. While testing multiple concurrent XSCP Clients, I noticed the lack of a proper tool to debug connection streams. Initially, I added log printing to the server, but that’s quite boring and you can’t use filters and see all bytes on the wire. So I investigated and I found that Wireshark supports natively plugin integration with Lua scripts. So I added my own XSCP Protocol Dissector. You can find this Lua script on this link and import it in Wireshark, I also recommend adding a different color for XSCP Packets to distinguish them from other protocol packets.
In the image below, you can see how visual and intuitive it is to debug XSCP Connections with Wireshark. Orange packets are XSCP ones and the rest of the packets are TCP packets (for example we can see the TCP three-way handshake in packets with number 8, 9 and 10).

Building XSCP from scratch has been an incredibly interesting project. It served as a fantastic way to truly understand the foundations of network and systems programming—from byte-level PDU design and async concurrency with Tokio, to traffic visibility with Wireshark.
That’s all for now! If you want to check out the full source code, open an issue, or contribute to the project, feel free to visit the GitHub repo. Until next time!